Hi All! Belen is back today to share one of the more fun aspects of Filofax life – accessories! Her other posts are here: Post One, Post Two and Post Three.
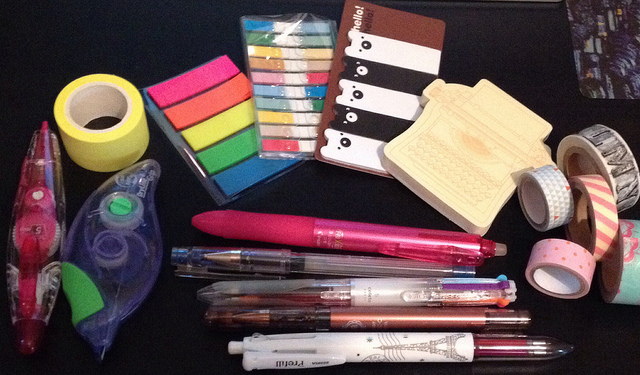
For me, half the fun of Filofax-ing is the accessories. We all have our favorite pens and stickies to color-code and decorate our planners. This post isn’t about that. (But it makes for an eye-catching photo, doesn’t it? Don’t worry, I won’t leave you hanging. If you want to see my supplies in detail, go to my Flickr photostream at http://www.flickr.com/photos/tiabel/ .) This post is about the more structural accessories: page lifters, dividers, pockets, rulers, etc.
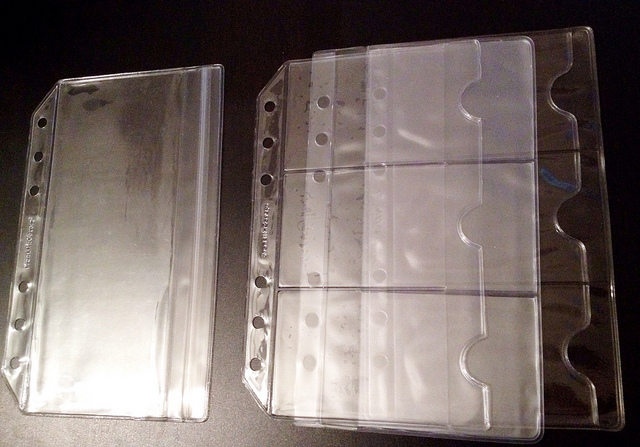
The page lifter is a must in my binders. I put one on the back and one on the front. It does exactly what the name implies – lifts the pages so you can easily flip all the way forward and back without turning the binder upside down and shaking it. Additionally the pages don’t get scrunched up into the ring hardware. (If you have no idea what I am talking about, you either have a magic binder, or you have never overfilled your binder and I bow to your superior Filofaxing skills). In this photo is one from FranklinCovey (left) and two I made myself from a poly binder (middle) and an old notebook cover (right).
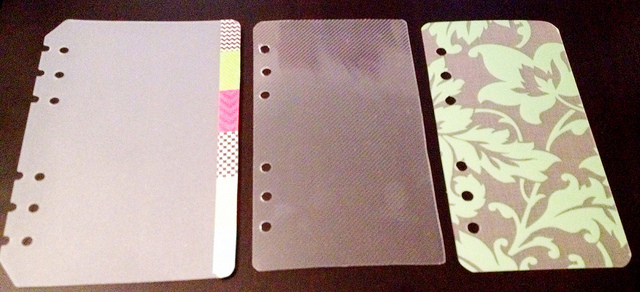
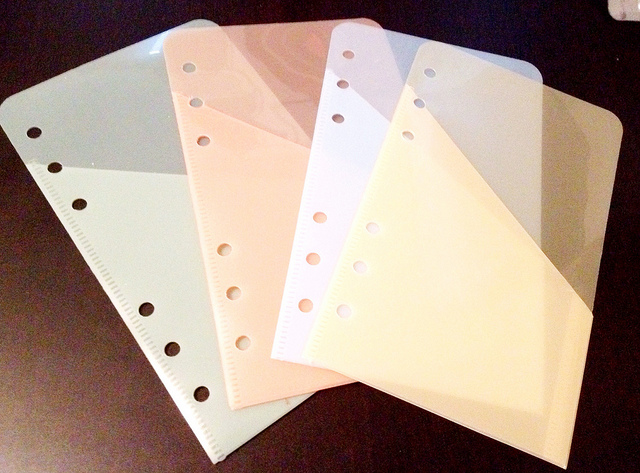
The fly leaf is meant to protect the top page in the planner. This is not really necessary, since I use the page lifters, but I have taken the concept and made them into full-size page markers of sorts. I reinforce the holes with washi tape then cut/notch them so I can easily insert and remove them from anywhere in my binder. I also tape the edge so I can easily find it as I flip the pages. I could use a ruler or a tab for this, but I like this method better because 1) it works, and 2) it keeps a clean look to my planner. I have made these myself from acetate, transparencies, and report covers. Any clear sheet of plastic will work, and I like upcycling old things for new uses.
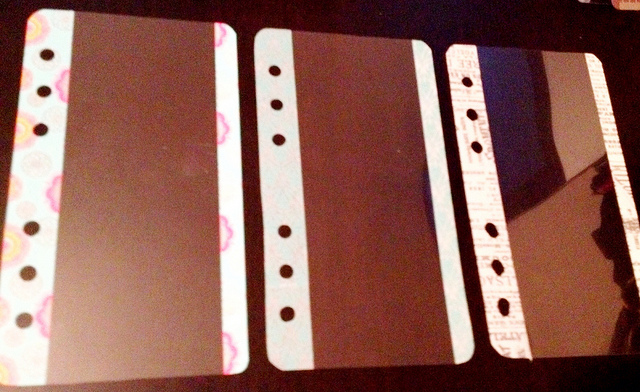
There’s not much to be said about dividers. Anything goes! Add a tab to any page in your planner and you have a divider. I covered how I use envelopes as dividers in a previous post so this is just a photo of some others I have used before. Top left is FranklinCovey. Bottom left is from some no-name binder I had long ago. (Ditched the binder. Kept the dividers.) On the right is top-tab set from Muji.
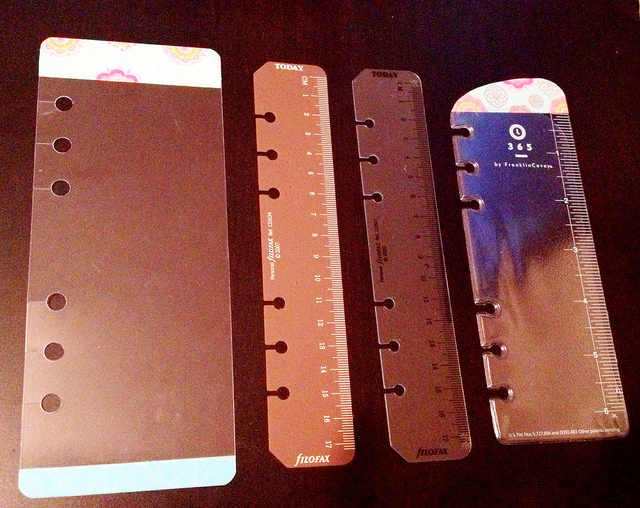
The ruler is also a must and I usually keep two of them in each binder. The two in the middle are Filofax in clear (metric only) and brown (metric and inches). The one on the left I made myself from acetate because 1) the middle is absolutely clear for an unobstructed view of my page, and 2) it protrudes just a bit farther on both top and bottom. This is the one I use to mark my place in the diary. The last one on the right is FranklinCovey and it’s hard to see, but it’s like a cute little pocket. I sometimes put a few stickies in there.
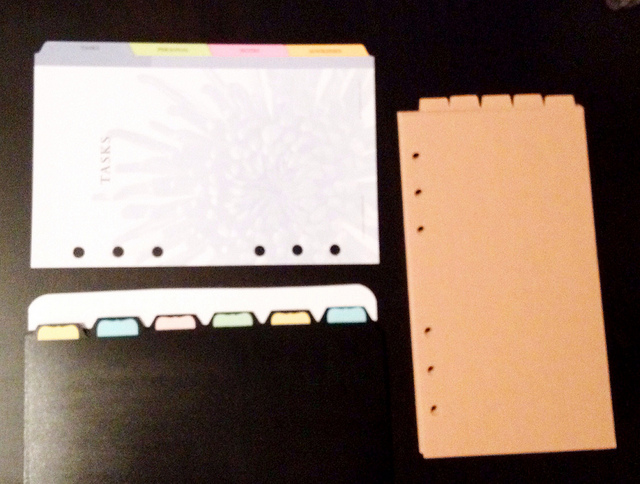
This is self-explanatory so I will only say that these are from Day Runner and I got them at Staples for $7.
Again, self-explanatory.

I am in awe of people who decorate their planner pages. It’s like a planner/diary/logbook/collage/scrapbook/art journal and time capsule all in one! I love looking at the YouTube videos and I can watch for hours. (Not kidding.) That said, I don’t do it. (Yet.) However, I do use washi tape for the following purposes:
• to reinforce the holes
• to cover up a wonky or ragged edge
• to cover up holes and re-punch them
• to frame a section (matching fly leaf at beginning and end)
• to make a border on a divider
And that’s it, my rundown of accessories that I have bought, used, made, and appreciated. There are many more that I have seen and that I want to try someday, but for now, I just enjoy the videos.
Thanks for reading! My next and final post will be a wrap-up and reflection post.
I love your explanations for Flyleaf and Page Lifter! Thank you! 🙂
I love this post!